Designed To Work For All Professions.

Continuing Ed Tracker LIVE
Helping Licensed Professionals Stay Licensed

Product Tour
Helping Licensed Professionals Stay Licensed

Continuing Ed Tracker LIVE has two main components: the Administrative Back End and the User Front End. The Administrative Back End is for those in charge of tracking and managing employee licenses and the continuing education they receive. The User Front End is for the employee so that they can quickly log in to view the status of their licenses and the continuing education credits they have received.

The tours below will walk you through each side of Continuing Ed Tracker LIVE so you can see for yourself how valuable this application will be for your company.

Administrative Back End

Click Here To Begin
Continuing Ed Tracker Live


User Front End

Click Here To Begin
Continuing Ed Tracker Live


Product Tour - Administrative Back End

The Administrative Back End allows administrators to quickly view employee licenses that are about to expire, view credits needed and received, renew employee licenses, manage course credits received, create attendance certificates, create upcoming courses for employee registration, and much more.


Administrative Back End | User Front End
  • Slide 1 of 51


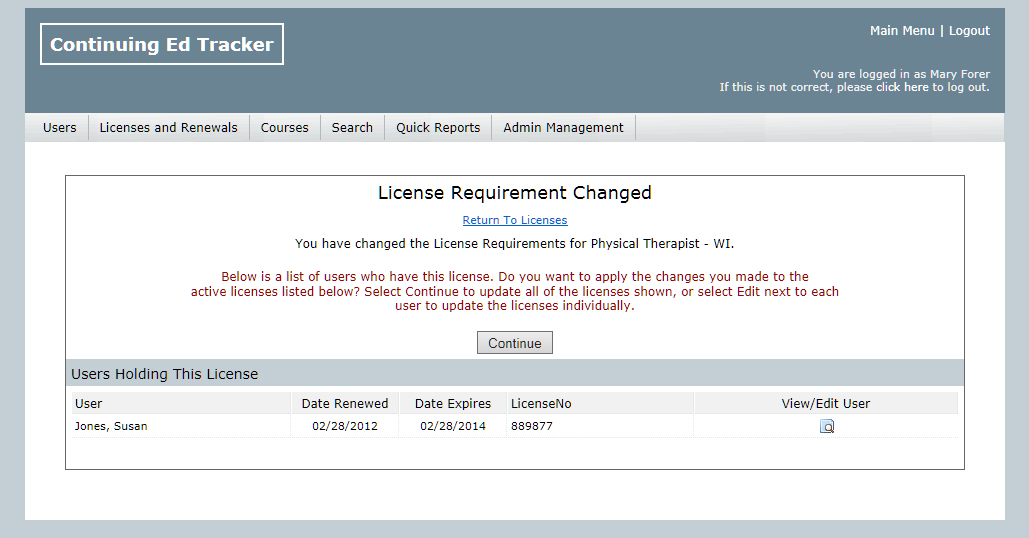
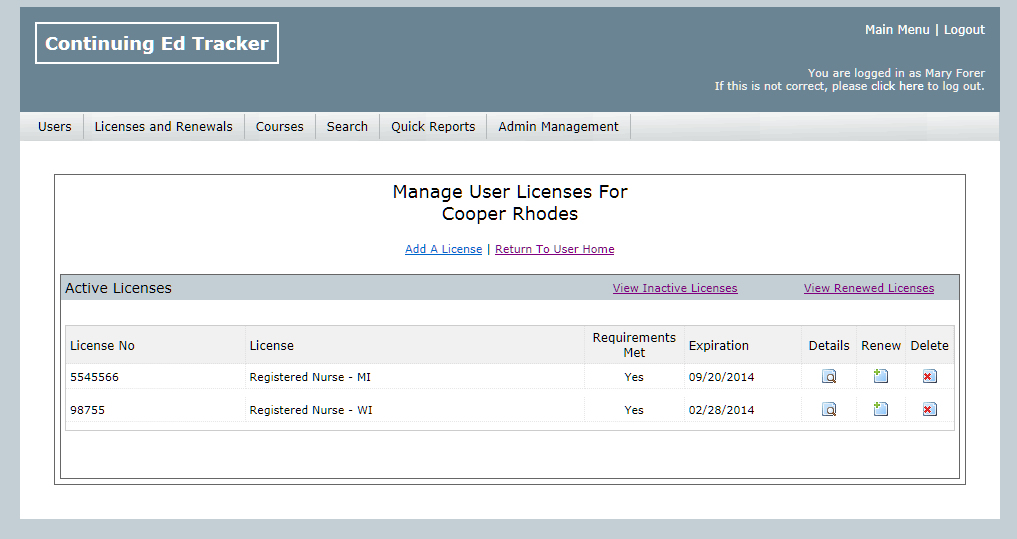
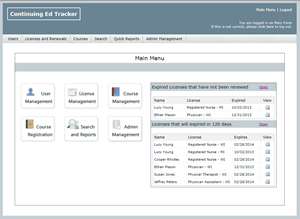
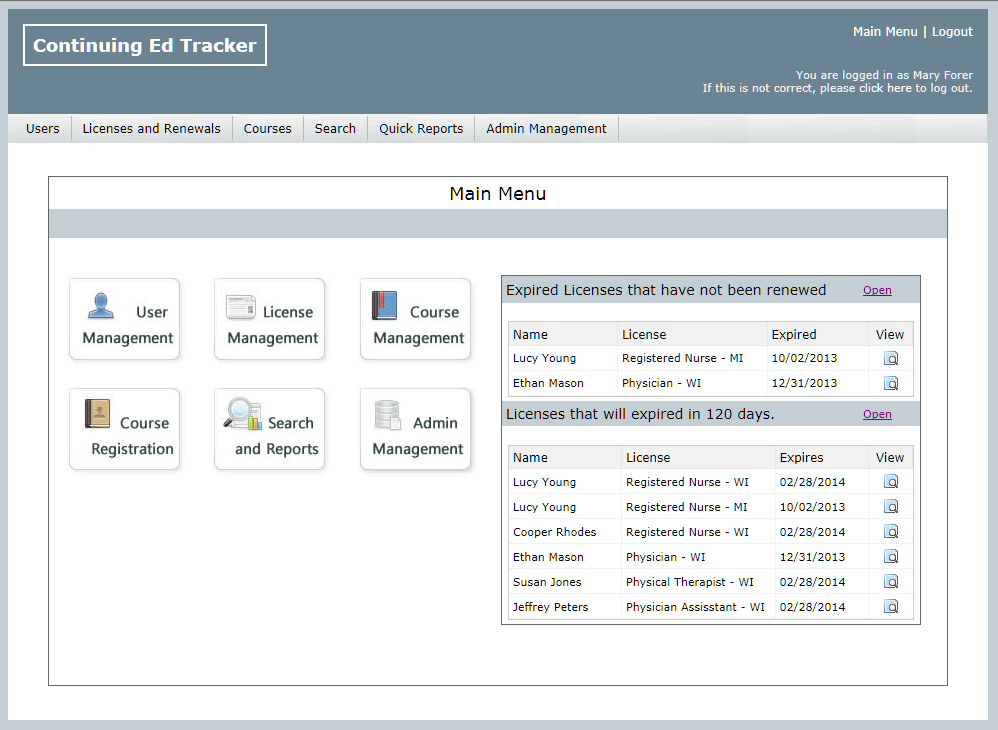
    At the Main Menu, administrators are notified if any user licenses have expired or are due to expire. Administrators can click the Open link to view more detail about the user licenses in each list, or jump directly to a specific user license by clicking View next to the user in the list.

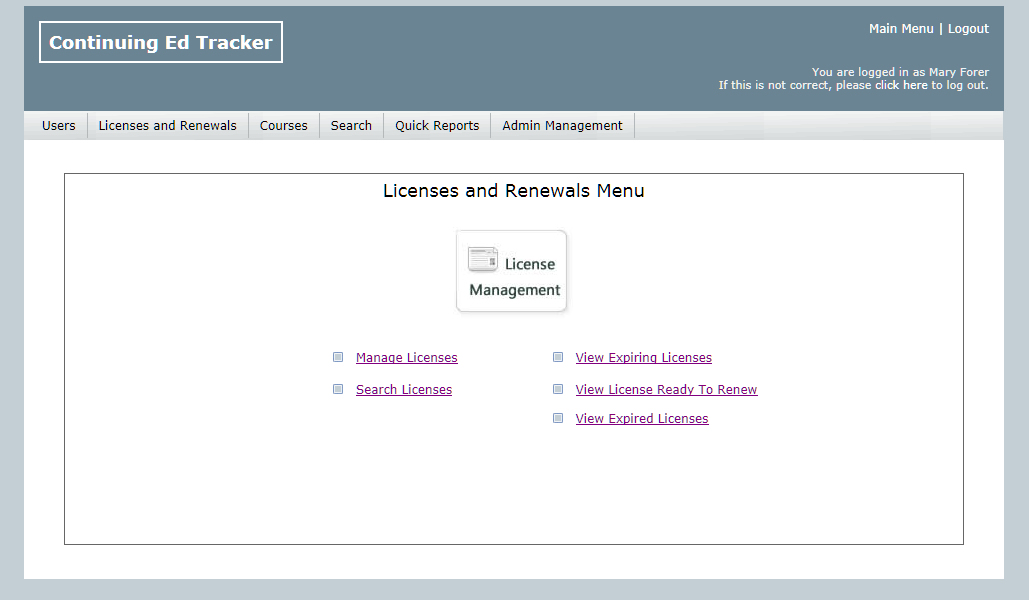
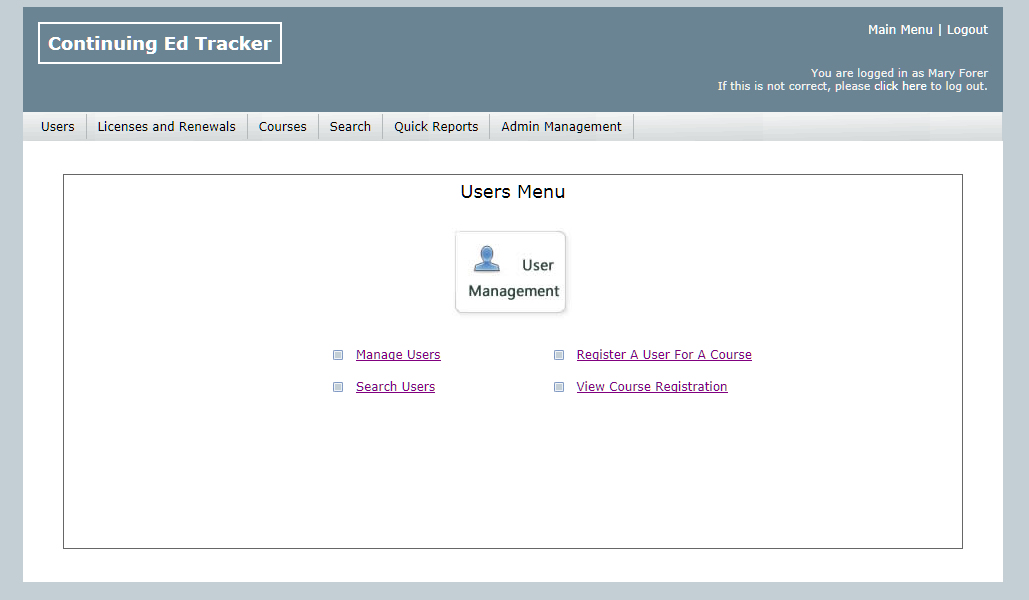
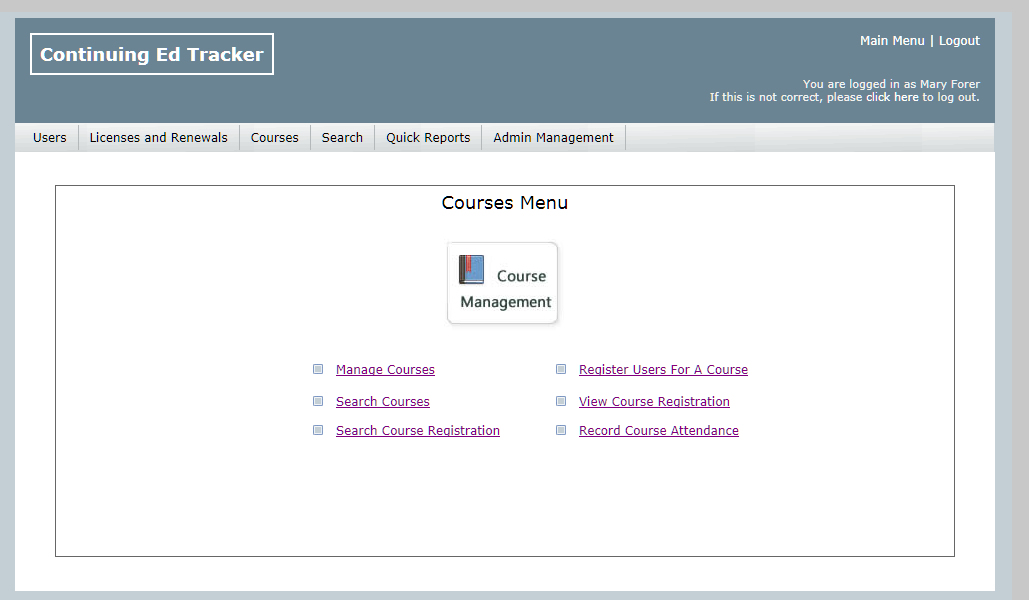
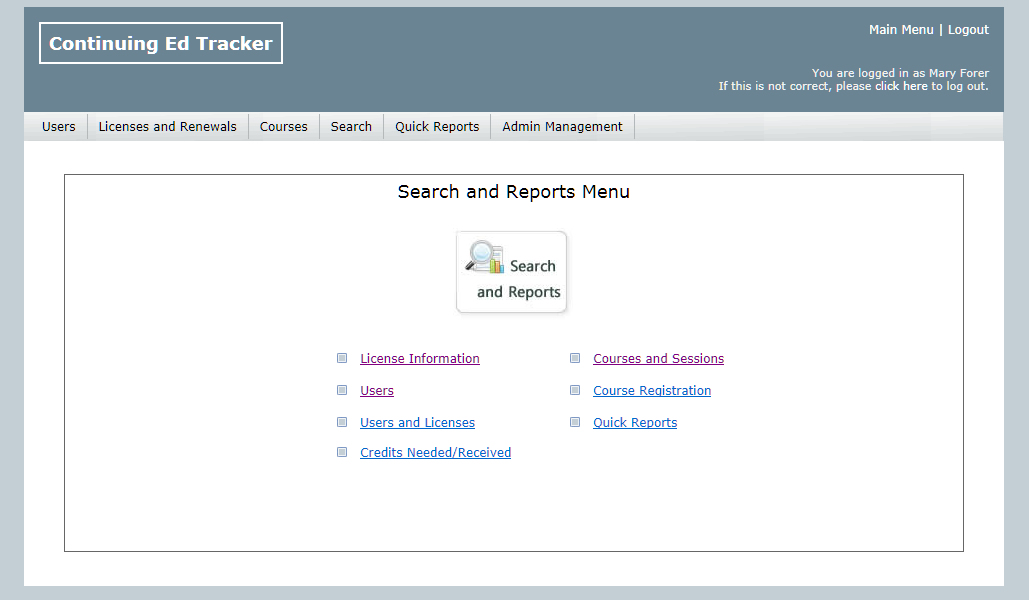
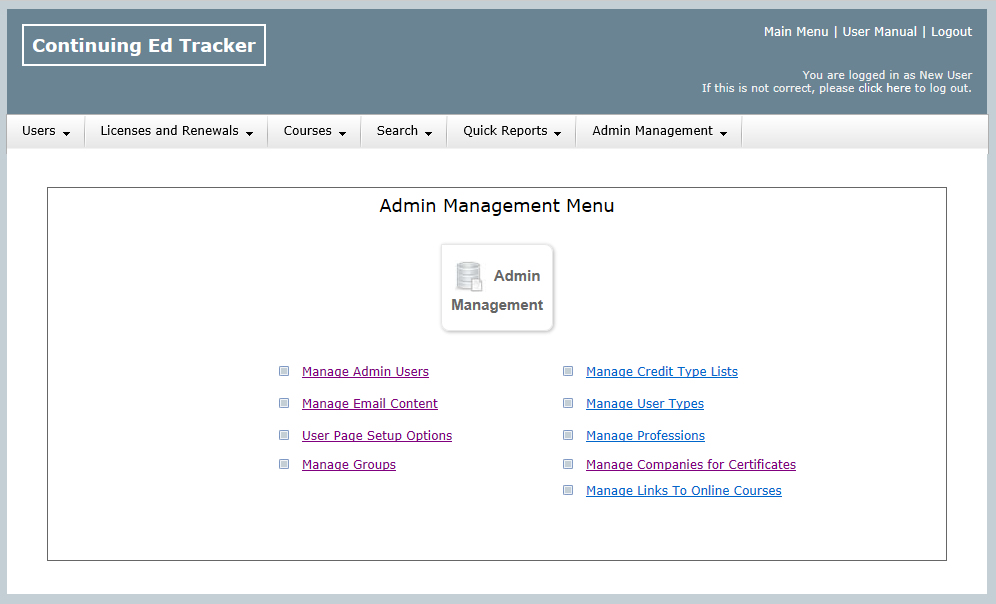
    Links to the various features of Continuing Ed Tracker LIVE are also provided so administrators can quickly perform needed tasks.

  • Slide 2 of 51


    The License Management link on the Main Menu will take you to the Licenses and Renewals Menu. From this menu, you can manage the licenses held by your users, search licenses, view expiring licenses, view licenses ready to renew and view expired licenses.

    These options are also available by selecting Licenses and Renewals from the menu bar at the top of the screen.

  • Slide 3 of 51


    The right side of the Manage Licenses screen shows a list of licenses entered into Continuing Ed Tracker LIVE. Click a license in the list to view details about the license including renewal term, continuing education requirements and a list of users holding the license.

    From this screen, you can add a new license, edit an existing license, manage continuing education requirements, and view details of users holding the license.

  • Slide 4 of 51


    For each license entered, you can set up a list of continuing education requirements needed to renew that license.

    The flexible design allows you to enter all credits that are required and also set up optional credit requirements. With the optional credit requirements feature, you can create a group of credit requirements and define how many credit requirements in the group are needed or define the total number of credit needed for the group.

  • Slide 5 of 51


    When the requirements for a license have changed, Continuing Ed Tracker LIVE will check to see if there are users currently holding the license. If there are, it will ask you if you want to apply your changes to all of the active licenses.

    If you select Continue, all of the active user licenses will be updated with the new or changed requirement and any course credits earned by each user will be automatically applied.

  • Slide 6 of 51


    The User Management link on the Main Menu will take you to the Users Menu. From this menu, you can manage users including user licenses and continuing education credits received, search users, register a user for a course and view course registration.

    These options are also available by selecting Users from the menu bar at the top of the screen.

  • Slide 7 of 51


    Manage Users takes you to a list of users in your database. Quick search fields are available at the top of the screen so you can easily locate a user or group of users.

    From this screen, you can also add a new user, view a user profile, delete a user, access the advanced search, and print or export your list.

    The sort arrows next to each field in your list of users gives you flexibility in viewing your data.

  • Slide 8 of 51


    Select View/Edit next to a user on the User Management screen to open the User Home screen. This screen will show you contact information, current and active user licenses, and a list of courses including the number of credits earned and applied to the user licenses.

    From this screen you can edit the user profile, manage user licenses, manage user courses, print attendance certificates and more.

  • Slide 9 of 51


    The User Profile screen is used to add or edit users. Basic contact information is gathered on this screen. You will also use this screen to set a user as active or inactive, and define groups of users using the Profession and User Type fields.

    After a User Profile has been added or edited, you can check the box at the bottom of the screen to have an automatic email sent to the user which will include their log in information.

  • Slide 10 of 51


    Select Manage User Licenses on the User Home screen to add a new license for the user, renew a license or view details of a license.

    From the screen, you can also view inactive licenses and view licenses that have been renewed.

  • Slide 11 of 51


    If your user has obtained a new license or certification, you will add the license to the user profile from this screen.

    Note: It is best to make sure the license or certification you are adding to a user is already define in the Licenses and Renewals section.

  • Slide 12 of 51


    After clicking Submit to add a new license, you are redirected to the User License Details screen. From this screen, you can click the Find Credits Received That Apply To This License link to automatically apply any credits received by the user that match the new license requirements.

  • Slide 13 of 51


    When you renew an existing license, the license title and license number will populate on the screen. If all the requirements for the license have not been met, a warning message will appear on the screen.

    After clicking Submit you will be redirected to the User License Details Screen. You can click the Find Credits Received That Apply To This License link to apply any credits received by the user that match the new license requirements.

  • Slide 14 of 51


    Select View Details next to a user license on the User Home or Manage User Licenses screen to view credits needed, received.

    From this screen you can also edit the license, edit license requirements, add credits received, renew the license, and refresh the applied credits by clicking the Find Credits Earned That Apply To This License link.

  • Slide 15 of 51


    If a license was entered incorrectly, or renewal dates or requirements have changed, you can select Edit This License from the User Details Screen to correct the license information.

    After clicking Submit you will be redirected to the User License Details Screen. There again, you can click the Find Credits Received That Apply To This License link to refresh the applied credits based on the changes you've made to the license.

  • Slide 16 of 51


    You can also add a requirement to an existing user license by clicking the Add A License Requirement link.

    Upon clicking Submit, Continuing Ed Tracker LIVE will add the requirement to the user license and check for any course credits received that apply to the new credit. Any matches found will be automatically applied.

  • Slide 17 of 51


    By clicking Show next to a license requirement on the User License Details screen you will open a list of credits earned by the user that meet the license requirement. The Credits Applied column indicates if the credits have been included in the total credits received for that requirement.

    Upcoming courses will show Pending in the Update column. Credits earned for the course will be applied after the course date has passed.

  • Slide 18 of 51


    A detailed report showing license requirements and all credits earned can be printed by clicking the Print Report link from the User License Detail screen.

  • Slide 19 of 51


    Select Manage Courses from the User Home screen to access a list of courses registered for or attended by the user. The list of courses will show the credits earned for attending the course and show the number of credits that have been applied to user license requirements.

    From this screen, you can also print attendance certificates, view details of the course and course attendance, and delete a course.

  • Slide 20 of 51


    The Course Details screen will allow you to print attendance certificates, print a report, mark registration, mark attendance, edit attendance dates and edit credits earned.

    Click Show under License Requirements to view a detailed list of how the credits earned were applied to the user's license requirements.

  • Slide 21 of 51


    Click Show under License Requirements on the Course Details screen to view a list of active user licenses and license requirements. You will see a list of Total Credits Needed and Total Credits Received for each license requirement. If the credits earned for the course match the requirement, the number of credits earned will appear under the Applied This Session column.

    If you need to edit the credits received for a particular course, you can click the Edit Credits Received link.

  • Slide 23 of 51


    A report showing details of course attendance and showing how the credits earned were applied to the user license can be printed by clicking the Print Report link from the Course Detail screen.

  • Slide 24 of 51


    The Course Management link on the Main Menu will take you to the Courses Menu. From this menu, you can manage courses, search courses, search course registration, register a user for a course and view course registration.

    These options are also available by selecting Courses from the menu bar at the top of the screen.

  • Slide 25 of 51


    Manage Courses takes you to a list of courses in your database. Quick search fields are available at the top of the screen so you can easily locate a course or group of courses.

    From this screen, you can also add a new course, view course details, delete a course, access the advanced search, and print or export your list.

    The sort arrows next to each field in your list of courses gives you flexibility in viewing your data.

  • Slide 26 of 51


    The Courses screen allows for great flexibility in setting up courses. You have the option to set up an ongoing course, archive courses that are no longer offered, create an upcoming course and allow users to register for the course from their own page, select a Company providing the course for printing on attendance certificates and much more.

  • Slide 27 of 51


    If the course has multiple sessions, a Sessions tab will appear on the screen. Click this tab to add, edit or view sessions including number of credits and credit type received for attending the session.

    If the course does not have multiple sessions, a Credits tab will appear on the screen. Click this tab to add, edit or view the number of credits and credit type received for attending the course.

  • Slide 28 of 51


    When changes are made to course or session credits, Continuing Ed Tracker LIVE will look to see if there are users that have registered for or attended the course. If there are, a message will appear on the screen asking if you want to update all user records. If you select Continue, Continuing Ed Tracker will check the license requirements for the registered users and apply credits earned for the course as appropriate.

  • Slide 29 of 51


    The Cost tab on the Course screen allows you to add, edit or delete costs related to a course. This can be useful if you are charging for an upcoming course or if you simply want to track the amount spent for continuing eduction by your users.

    Entering course cost is not required when setting up a course.

  • Slide 30 of 51


    The Course Cost screen gives you great flexibility in defining course costs including setting cost by course or session, setting costs by date registered, and setting costs by user groups.

  • Slide 31 of 51


    There are several ways to add courses to a user profile. If the course is upcoming or has been attended by several users, you can select Course Registration from the Main Menu. The course should be entered in the Courses section before beginning the Registration process. An Add New Course link is also provided on this screen.

    Several Quick Search fields have been added to the top of the screen to help you locate a Course. Clicking the Select icon next to a course will take you to the registration screen.

  • Slide 32 of 51


    The Registration screen allows you to quickly register multiple users for an upcoming course or add a course attended to multiple users.

    Check the select box next to the users that will be attending or have attended the course and click Register Selected Users. The selected users will appear on the right side of the screen. You can click Go To Registration Details if you need to enter additional information about the course registration such as which sessions were attended, payment information, etc.

  • Slide 33 of 51


    A list of users registered for a course appears on the right side of the Registration Details screen.

    By default a user is registered for all sessions when registering for a course. The registration can easily be changed by clicking the Yes or No link under the Registered column.

    If a course is upcoming, the Attended field will show Pending. If the course has passed, the Attended field will show Yes. Simply click the Yes link if the session was not attended by the user.

  • Slide 34 of 51


    The Course Registration Detail screen is useful for courses that have multiple costs levels, multiple sessions or if you want to print a registration form for a user.

  • Slide 35 of 51


    You can also add a course directly to the user profile by clicking Manage Courses from the user profile screen. If the course has already been added to the Course section, you can select the course from the drop-down list. If the course is not in the drop-down list but may be attended by other users, you will select the Set Up Course Details link to create the course. If the course will only be attended by the selected user, you can click the Quick Add link which will allow you to enter basic course information and credits received to the user profile.

  • Slide 36 of 51


    After adding a course to a user profile, you will be taken to the Course Attendance Screen. From this screen you can edit registration and attendance, print an Attendance Certificate or print an attendance report.

    You can also click Show under the License Requirements column to show details of how the credits earned were applied to the user license requirements.

  • Slide 37 of 51


    Attendance Certificates can be printed from the User Home screen or the Course Detail screen.

    The company information, logo and digital signature that appear on the certificates are set up through the Companies screen under Admin Management.

  • Slide 38 of 51


    Access to advanced search has been mentioned throughout this tour. All of these screens have been pulled together in the Search and Reports Menu for easy access. The descriptive links help you choose which screen to use.

    We will select the Credits Needed/Received screen from the Search and Reports Menu for this demonstration.

  • Slide 39 of 51


    The advanced search screens are flexible and easy to use. Simply select the field you want to search, select an operator and enter your criteria. Repeat the steps to add additional criteria. The Query box will display your search criteria for your review.

    After your search is complete, you have the option to sort your search results, print your search results, print a custom report and export your search results..

  • Slide 40 of 51


    The custom report feature gives you great flexibility in getting exactly the output you need.

    Use the field list on the left side of the screen to select which fields should be included in your report. You have the option of sorting, grouping, totaling and counting each field in the report.

    You can also click the Save As New Report checkbox to save your report layout for future use.

  • Slide 41 of 51


    For this example, we selected to group the report by License Title and License State, sort by License Title, License State, Last Name and First Name, and total the number of credits needed.

    The flexibility built in to the advanced search and custom report screens throughout Continuing Ed Tracker LIVE gives you unlimited search and reporting capability.

  • Slide 42 of 51


    The Admin Management allows you to control who has access to the admin site, create admin groups, change the content of automated emails, control how much your users can and can't do, and manage the content of several drop-down lists used throughout Continuing Ed Tracker LIVE.

  • Slide 43 of 51


    In Continuing Ed Tracker LIVE, you can have as many Admin Users as needed with no additional licensing fees. From the Admin User screen, you can also indicate which Admin Users will receive email notifications when a new user is added, when a user profile is updated or when a user registers for an upcoming course.

  • Slide 44 of 51


    You can restrict how much your administrators can and can't do by selecting View/Edit User Rights. Check the boxes you want your administrator to be able to do. Uncheck the boxes to restrict access.

  • Slide 45 of 51


    Admin Groups allow you to create groups of users by profession, department, etc. and assign a group to an administrator. The administrator will then only be able to see the users in their group and will not have access to any other users in the system.

  • Slide 46 of 51


    The Email Content Management screen allows you to control the text contained in the automated emails throughout Continuing Ed Tracker LIVE. These automated emails are sent when a new user profile is created, when a user profile is updated and when a user registers for an upcoming course.

    You also have the flexibility of selecting which Admin User appears in the From line of the email.

  • Slide 47 of 51


    The User Page Setup Options screen allows you to control how much your users can do. Unchecking all of the boxes on this screen will give you total control over entering user licenses and recording course attendance. Checking all of the boxes on this screen will allow users to add new licenses to their profiles, add courses attended, edit credits received, etc.

    On this screen, you can also specify an Admin Contact. The Admin Contact will be the main contact for your users.

  • Slide 48 of 51


    You can easily manage the credit types used in defining license requirements and credits received from courses attendance. It is best to define your credit types before entering any license or course information.

    If you need to edit or delete a credit type after data has been entered, Continuing Ed Tracker LIVE will first show you a list of where that credit type is currently being used. Reviewing the list will help you determine if you can safely edit or delete a credit type or if it would be better to add a new credit type.

  • Slide 49 of 51


    Maintaining a list of User Types can be used to group different types of users together. For example, your user types can be a list of professions, members or nonmembers, employee or contract workers, etc.

    If you need to edit or delete a user type after data has been entered, Continuing Ed Tracker LIVE will first show you a list of where that user type is currently being used. Reviewing the list will help you determine if you can safely edit or delete a user type or if it would be better to add a new user type.

  • Slide 50 of 51


    The Company screen is used to define the various companies that provide courses to your users. The information entered into this screen is used to populate attendance certificates. Features on this screen include uploading company logos and digital signatures for the attendance certificates.

  • Slide 51 of 51


    Maintaining a list of Professions is another way to group different types of users together. Often times, the list of professions will reflect the different types of licenses held by your users.

    If you need to edit or delete a profession after data has been entered, Continuing Ed Tracker LIVE will first show you a list of where that profession is currently being used. Reviewing the list will help you determine if you can safely edit or delete a profession or if it would be better to add a new profession.

  • Slide 52 of 51


    A FREE setup consultation is included with every purchase of Continuing Ed Tracker LIVE.

    You will also receive FREE-Unlimited tech support via email for as long as you subscribe to our product.

    Continuing Ed Tracker LIVE is fully customizable. If you have a special need or concern about if our product will work for you, feel free to contact us at sales@krcsoftware.com for a free consultation.

Sign Up Today - It's FREE.

Still Not Sure!
Start A 15-Day Free Trial.

See for yourself what Continuing Ed Tracker LIVE can do for you.
No payment information is required until you decide to buy.